Optimizing Deployment and Testing: ServiceNow ATF Suites with GitHub and TypeScript
Alright. So last time was a bit of a failure all around. I don’t know if it was my reading comprehension of ServiceNow documentation or something else. I’ll chalk it up to the reading comprehension.
As a result I had to do more digging. I found a support wiki, which is directly linked here. It is a bit confusing due to the styling, grammar, and spelling. It does work which is all we need.
The components are:
- A JKS keystore file
- A ServiceNow JWT Provider
- A ServiceNow JKS certificate record
- A DER Certificate
- A ServiceNow JWT Signing Record.
- A script
- A ServiceNow OAuth endpoint for external machines.
You will need the following programs:
- keytool
- openssl
I would recommend setting up WSL on your Windows box for this or using a container. Generating keys is messy for me, or I’m just messy and it’s good to wipe things out and start over again if need be. I’ll write how to do these things in a later blog post.
My personally I am using WSL 2 with Ubuntu.
Creating the keystore and certificates
The first thing to do is to create the keystore and certificate files. The commands to do this are below. These are the commands I used.
Note: Be sure to execute this commands in a directory you can easily get to otherwise it’ll just dump it somewhere.
Command to create a JKS keystore
keytool -genkey -alias snclient -keyalg RSA -validity 365 -keystore snclient -storepass abc123pass -keypass abc123pass It is important to note you will be asked a bunch of questions like who you are, where are you from, and whatever. This is just used to actual create your certificate. Here is the actual documentation link. An example is below.
Enter keystore password: javacaps
What is your first and last name?
[Unknown]: development.sun.com
What is the name of your organizational unit?
[Unknown]: Development
what is the name of your organization?
[Unknown]: Sun
What is the name of your City or Locality?
[Unknown]: Monrovia
What is the name of your State or Province?
[Unknown]: California
What is the two-letter country code for this unit?
[Unknown]: US
Is<CN=development.sun.com, OU=Development, O=Sun, L=Monrovia, ST=California,
C=US> correct?
[no]: yes

Enter key password for <client>
    (RETURN if same as keystore password):
Commands to transform the certificate into a DER PEM certificate
keytool -exportcert -alias snclient -keystore snclient -storepass abc123pass -file snclient.cer

openssl x509 -inform der -in sncliet.cer -out snclient-cert.pem
Creating the ServiceNow records
Next, we’ll create the ServiceNow records. All of the certificates will reside on the Certificate [sys_certificate] table.
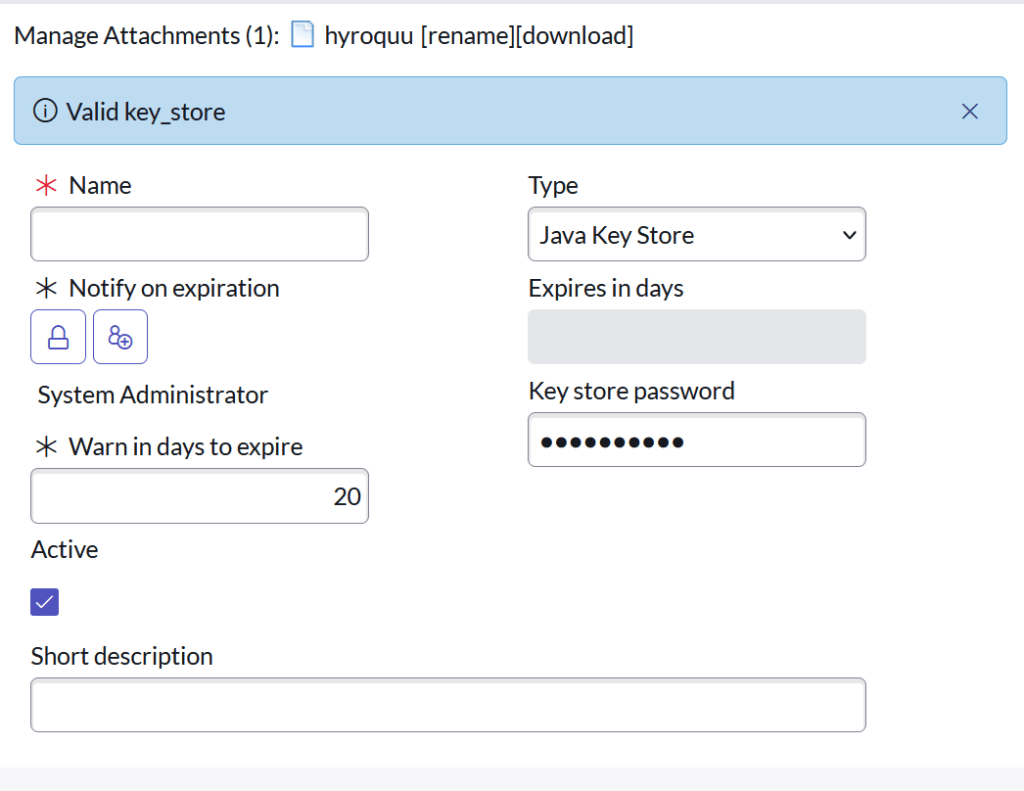
Create the JKS certificate record
First, create the JKS certificate record. It should look like the below image. You’ll notice the JKS record doesn’t have a file type. That is fine. The attachment is just the keystore file you created in this step. The keystore password is just the password you used in your setup. Once you attache the file and name it move on.
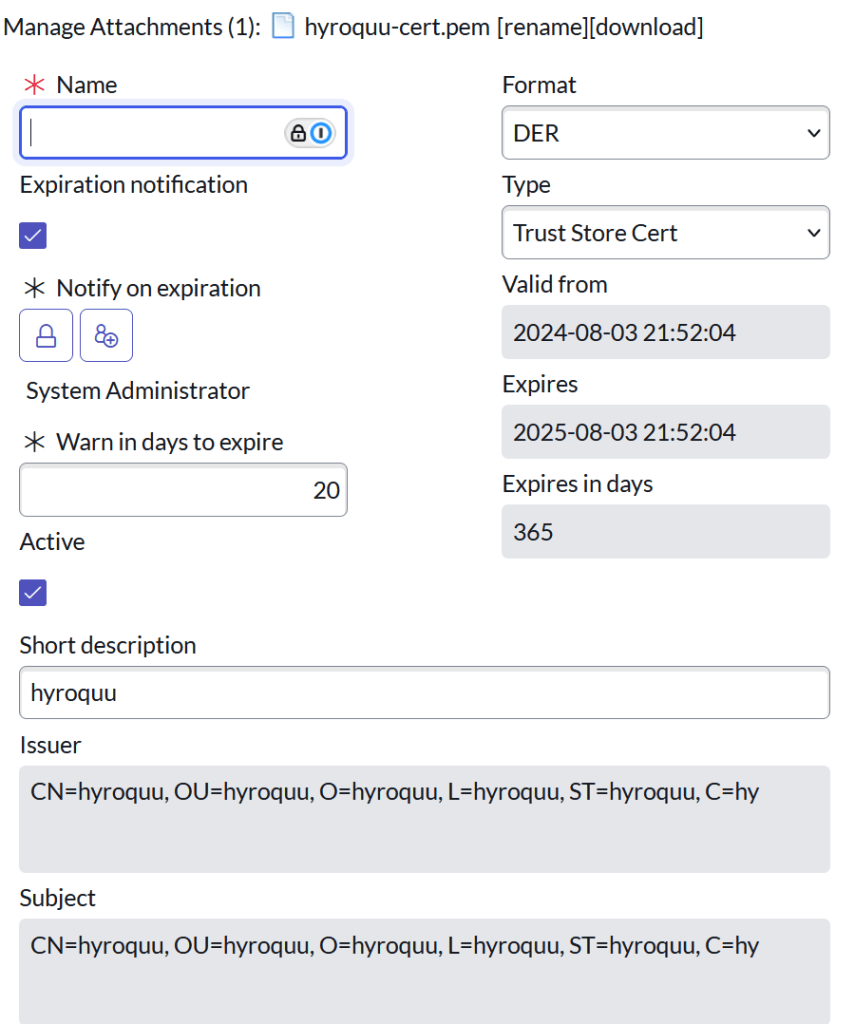
Create the PEM Certificate record
The PEM Certificate record should like the one below. You should just set the Format to DER and the Type to Trust Store Cert. Then attach the PEM cert you created in this step.
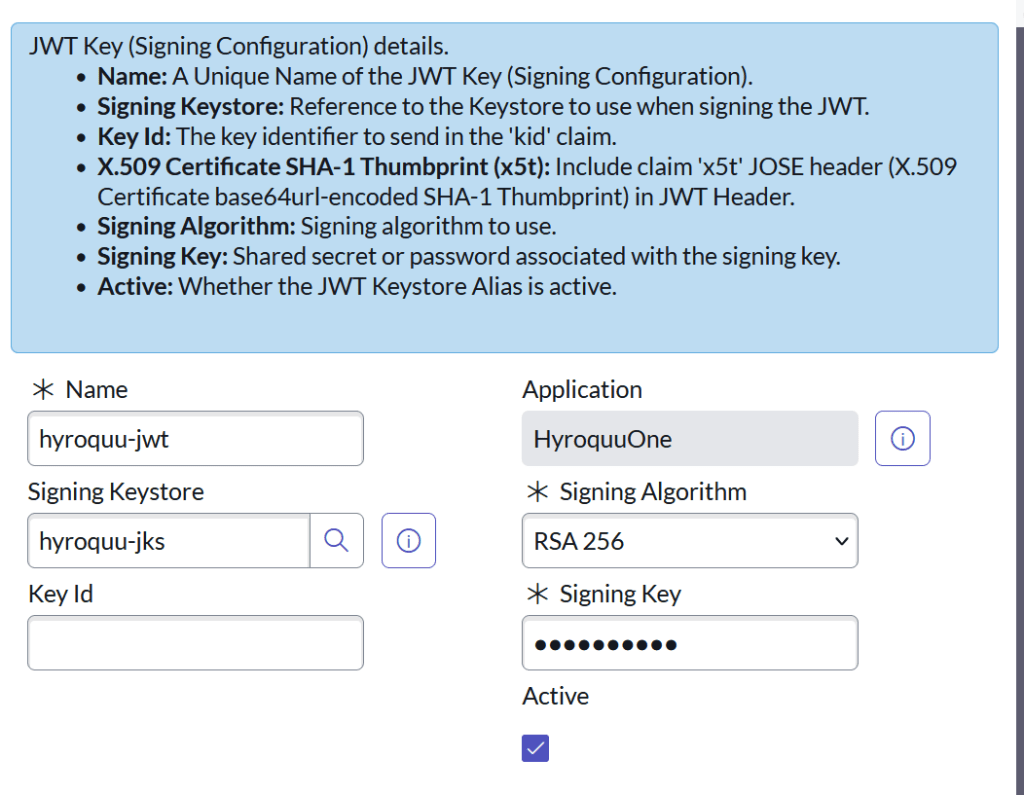
Create the JWT Signing Key record
The JWT Signing Key record exists on the JWT Key [jwt_keystore_aliases] record. The signing key is the same as the keystore password. The Key ID will be gathered later. The signing keystore field will be the JKS certificate record you created. It should be easy to find.
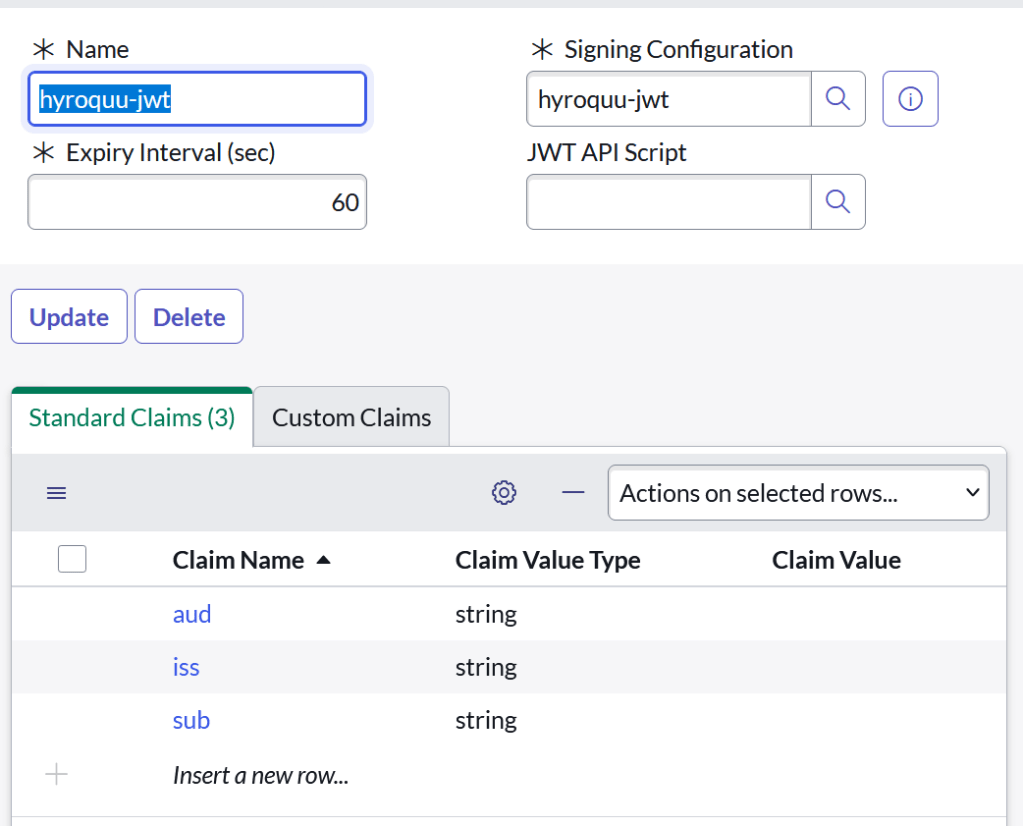
Create the JWT provider record
Now we create the JWT provider record. The record is on the JWT Provider [jwt_provider] table. You’ll just associate this to the JWT Signing Key you created before. After saving move on.
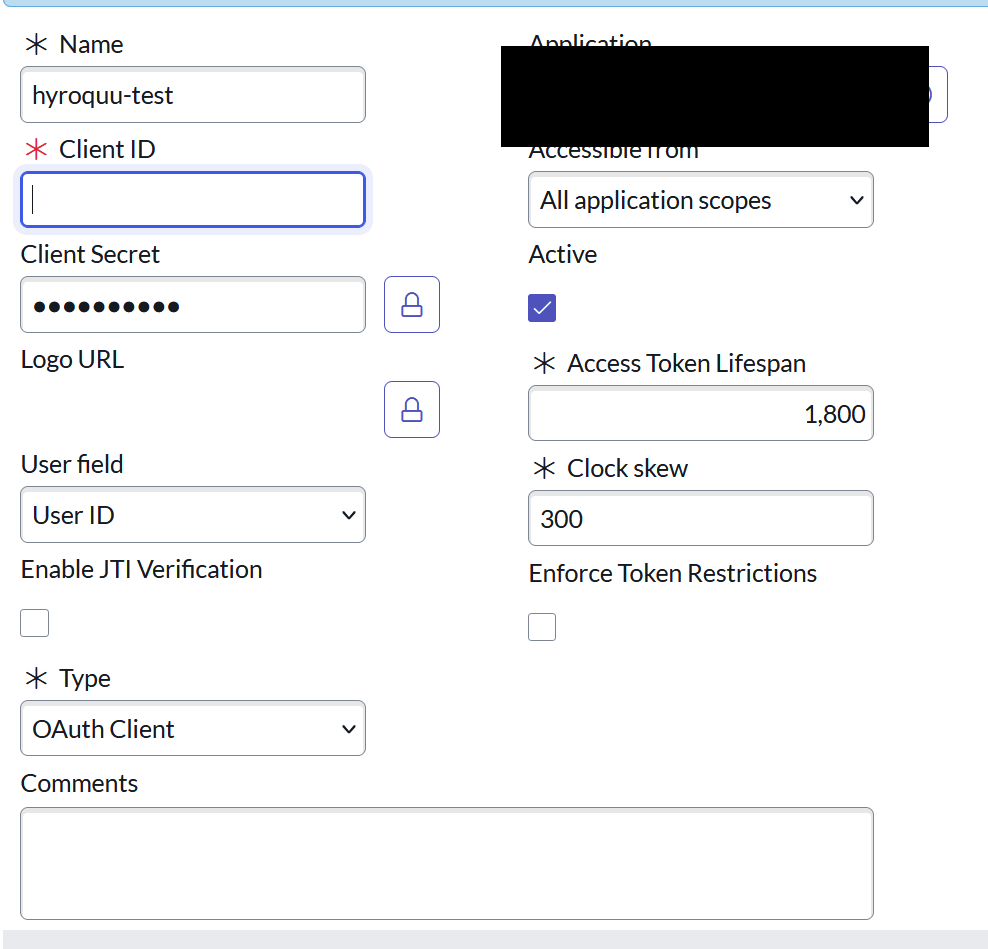
Create an OAuth JWT API endpoint for external clients and relate the JWT Verifier
My OAuth endpoint looked like this. Create and save the record. Navigate down to the related list and then you should see the Related List: Jwt Verifier Maps. Associate your PEM certificate to this new record. BE sure to notate the KID value. You’ll need this to update the record we created before.
The Shared Key value is blank I didn’t use it.
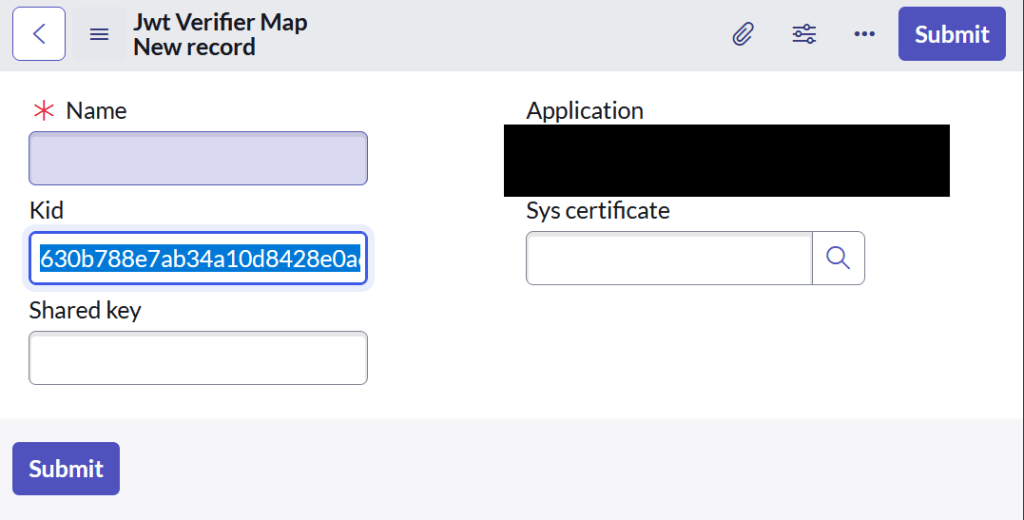
Update the JWT Signing record
Now go back to the JWT Signing record and update it with the KID value.
Run some code to create the JWT token
Now we finally create the JWT token. We use some JavaScript based on the ServiceNow API to create this. We’ll get a JWT token and then we can get a Bearer token for our machine to machine API calls. We aren’t done yet though. There is still more to come.
var jwtAPI = new sn_auth.GlideJWTAPI();
var headerJSON = {  "kid": "<ID generated in step-4>"  };
var header = JSON.stringify(headerJSON);

var payloadJSON = { "aud": "{cleint-id}", "iss": "{client-id}", "sub": "{email of the user for which the token needs to be assocaited to}" };
var payload = JSON.stringify(payloadJSON);

var jwtProviderSysId = " <sys id of the JWT provider record>";
var jwt = jwtAPI.generateJWT(jwtProviderSysId, header, payload);

gs.info("JWT:" + jwt);
More to Come
I’m tired and hangry. So, the rest of this will come in another part. See ya.
